Monday Tuts
Good day to you all, and tonight we fire up with some Paint Shop Pro Tutorials…
SUZANNE UPDATE
Today at the Chiropractor Suzanne booked a re-assesment for Wednessday this week, here we will have a report on exactly how much her posture and spine have improved since starting care. The Chiropractor is then heading off to Australia for a holiday (running away) for which we wish him well and safe journey for him and his family. And again we thank Adam for all the help and care he has given us for the last few months.
TAGGERS PARADISE
For those of you unfamiliar with the world of tagging and taggers this may seem alien, but there are thousands and thousands of Suzanne art fans using her work to make and share these stunning tag creations. As they play a huge part of Suzanne’s work I have decided to dedicate some blog time and space to share with everyone the instructions these taggers share with each other to help people make better and better tags. Please take the time to try this tutorial out, I will put up another tutorial tommorrow night and try it myself as well…. if you have a go please email your results to me grant@gorjuss.co.uk remember using Suzanne’s art in tags requires a license from ArtisticMindsInc.. and there are rules governing how these images can be used… If in doubt about what you can or cant do, contact customer services at Artistic Minds. Ok onto the Tutorial.
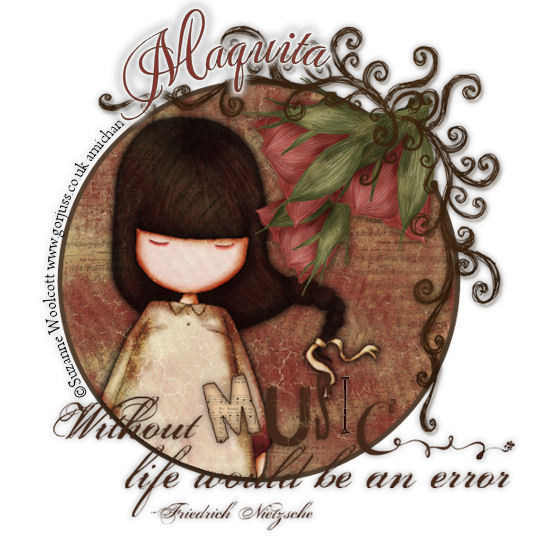
Now please excuse me as I find this quite difficult to understand, and Im trying the tuts out to see if I can do them, So firstly I shall show you what this tutorial is designed to help you create….

This Tutorial was supplied by Christina Anderson and she wins a prize for the use of this tutorial.. I would like anyone reading this thats never made a tag before to give it a go, and share the results with us all…
Im going to give it a go…
Firstly heres the things you need, including the program paint shop pro.
Supplies:
1: Image of choice
I used the artwork of Suzanne Woolcott who can be found at AMI.
2: Scrapkit of choice
I used “Altered Melody” by Irene V. Alexeeva at www.irenealexeeva.blogspot.com
3: Font of choice
I used MeaCulpa
Ok Im just getting some things to use as scrap kits…
STEP 1: Create a new canvas- 600×600 and flood filled white. (Click File, then New)
STEP 2: Open your rose element from the kit (or any flowers that you want to use instead). Resize so they fit the canvas better.
STEP 3: New layer- using your circle tool with the foreground color of choice and width at 5, background null (hiding), draw a circle.
STEP 4: Use your magic wand to select inside the circle you just drew and selections-modify-expand by 3.
STEP 5: Copy your scrap paper you want to use for your background and paste it as a new layer inside this circle. Selections- invert and hit delete on your keyboard.
*KEEP IT SELECTED*
So far so good, I found this pretty straight going up to the following step… now as a complete amatuer at this I found the next bit tricky… Ill explain why.
STEP 6: Copy and paste your tube as a new layer at this point as well, moving it to where you want it. Hit delete on your keyboard again and this will delete the part hanging out of the circle.
The problem I had at this stage was that I couldnt move it where I wanted… you’ll see in my final efforts…. Onwards with the Tut..
STEP 7: Selections- select none.
STEP 8: Add a drop shadow of choice to your circle layer.
STEP 9:Move the flowers to the position you want them in now. Add drop shadow.
I wasnt sure what flowers I was moving as the flowers I put in were right in the back ground had I made a mistake?? Anyway adding a drop shadow didnt work for me so I know I’m doing something VERY wrong… help me Christina!!!
STEP 10: On your tube layer change the blend mode to “hard light”.
I found this option eventually with prompting from Suzanne…. I never knew it was there… to the right of the layer opacity controls.. ooooh I learned something.
STEP 11: Lower the opacity to 90%, give or take depending on your image and how you want it.
STEP 12: Copy and paste the word art from the kit or any quote you like. Add drop shadow.
STEP 13: Add copyrights at this point… if you want to make it curved follow the next step….
YEH!!! I DID IT… I DID IT!!! stuff curved text, Im just happy to have something to show … lol I’ll be more adventurous in the next tut…
*to make text on a curve*
STEP 14: Draw a new circle bigger than the one you have to write the text on.
STEP 15: Using your text tool hover over the circle but don’t click the mouse yet. You want to see the text sign change from just an “A” with a plus sign over it to an A with a curve under it along with the plus sign…
STEP 16: Once you see the text tool change to the above mentioned left click and your text box will appear. Type in whatever text you want.
STEP 17: Now on your layers pallete there should be a plus sign next to your group containing the circle and text layers. Expand that group so you see both of those layers.
STEP 18: Hide the circle layer so all you see is the text. Now merge the group and now your text is on a curve.
STEP 19: Now add any names you like.
STEP 20: Resize by 90% and save your tag.
THATS IT!!
Now I have learned tonight that its not a simple process and that taggers do have a very developed skill and eye to produce tags at the levels they do.. my first ever tag is testiment to their continually improving art skills…
Here it is………….
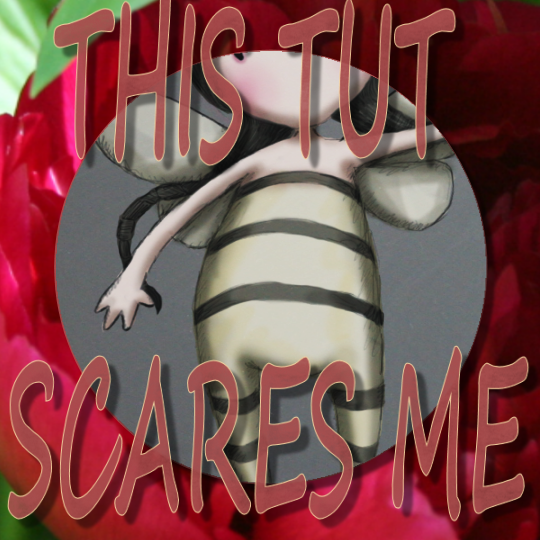
Mr G’s first ever TAG….


OMG! am so happy to see this tut here!!!! using my name on it…what an honour it was to have that tut and now see it here!! Thanks for doing it Christina hun, once again, and Mr G for chosing it 😀 😀
Maquita
Ummm MrG? I dont see the copyright and AMI info on that tag. Do I need to report you?? lol
it is there……… unfortuneately it got cropped by that damn circle and I have no idea where I went wrong… lol
I hope that as the week goes on I get better
ahhhh, well in that case you really need to learn how to bring layers to the top. If that was posted in JG I’d have to delete, hehehehe. Yes it is true I’m a stickler for following the TOU. lol
I give you kudos for giving PSP a try!!!
oh my 🙂
LOL…I was going to say the same thing Sandy did. Keep working on it Mr.G. You’ll get it. 😀
I can’t stop giggling, thanks again for choosing my tutorial! 🙂 By the way, you chose a little more difficult one for your very FIRST tutorial but I totally give you credit. I did by the way tell him to email me if he got lost… obviously I should have gotten an email a while ago. 🙂 j/k. Not sure what you did but heck, I give you 110% credit for TRYING it with no previous knowledge.
((HUGS)) for trying it out and thank you!
:omg: OMG defo well done for giving that tut a try Mr G XD
fab lil tut will have a try later today, xxxxxxxxxxx
ummmmmmm and this is supposed to encourage us (the tagging virgins)??
mommmyyyyyyyyyy!!!
Well maybe i dived in too deep.. lol… I think at the very least I have found an appreciation for what they do…as I say maybe I’ll find a simpler one for tonight…
help ma boab.. and Ill get my Lisence no.. :p
“help ma boab.. and Ill get my Lisence no.. :p”
translation please??!!
FAB job MrG looks alot better than my first try lol..suzy hope your well and family are good
lorna xxx
Aww MrG I agree good job for trying most people dont even try so youll get it eventually lol 😀
Don’t be so hard on yourself, my hubby read it and thought I was too vague on the tutorial so it’s definitely not just you… he doesn’t PSP either. Give your self credit here, at least you completed it!!!
Awww Great Try Mr G,at least you gave it a go,It won’t be long before your hooked,if your not already.. 🙂
Sorry for my bad english…
I believe that it’s the first time which I write you and i would like to tell you that your work and your world are amazing !
I like your small character and your style !
I add you in my links on my blog
Mr G, you did choose a very detailed tut (for a beginner tut!!!) to be your first lol, and I LOVE your results LOL thanks so much for the laugh good luck in learning to use tuts to tag
smiles
christy
Ü
😀